This foolproof peanut brittle recipe comes together in just about 15 minutes, making it perfect for holiday gifting or anytime treats. With a delightful crunch and buttery sweetness, this recipe is versatile and easily adjustable for your microwave’s wattage.
Ingredients (Makes ~1 pound)
- 1 cup granulated sugar
- Provides the sweet and crunchy base of the brittle.
- 1/2 cup light corn syrup (e.g., Karo)
- Keeps the sugar mixture smooth and prevents crystallization.
- 1 cup roasted, salted peanuts
- Adds crunch and a savory contrast to the sweetness. For best results, use fresh nuts.
- 1 teaspoon butter
- Adds a rich, buttery flavor and glossy finish.
- 1 teaspoon vanilla extract
- Provides a warm, aromatic note that enhances the overall flavor.
- 1 teaspoon baking soda
- Reacts with the sugar mixture to create the signature light and airy brittle texture.
Equipment Needed
- Microwave-safe, 1.5-quart casserole dish (e.g., CorningWare with a handle)
- Heatproof spatula or spoon
- Lightly greased cookie sheet or parchment paper
- Oven mitts (the dish gets extremely hot!)
Preparation Steps
- Prepare Your Workspace:
- Lightly grease a large cookie sheet or line it with parchment paper to prevent sticking.
- Have all ingredients pre-measured and ready to go, as the process moves quickly after cooking.
- Make the Sugar Base:
- In your microwave-safe casserole dish, combine 1 cup sugar and 1/2 cup light corn syrup. Stir until fully blended.
- Microwave on high for 4 minutes. (Tip: Monitor closely, as microwave wattages can vary. The mixture should start to bubble and slightly thicken.)
- Incorporate the Peanuts:
- Carefully remove the dish using oven mitts. Stir in 1 cup roasted, salted peanuts, ensuring they are evenly coated.
- Return the dish to the microwave and cook on high for 3-5 minutes, or until the mixture becomes light golden brown.
- (Tip: Watch the color—it should look like honey. If too dark, it may burn.)
- Add Butter and Vanilla:
- Remove the dish and immediately stir in 1 teaspoon butter and 1 teaspoon vanilla extract. Mix thoroughly until smooth.
- Microwave again for 1-2 minutes on high. The mixture will bubble vigorously.
- Create the Foamy Texture:
- Quickly stir in 1 teaspoon baking soda. The mixture will foam up and expand as the baking soda reacts. Gently stir until the foam is consistent.
- (Tip: Work quickly but carefully, as the mixture is extremely hot.)
- Quickly stir in 1 teaspoon baking soda. The mixture will foam up and expand as the baking soda reacts. Gently stir until the foam is consistent.
- Spread the Brittle:
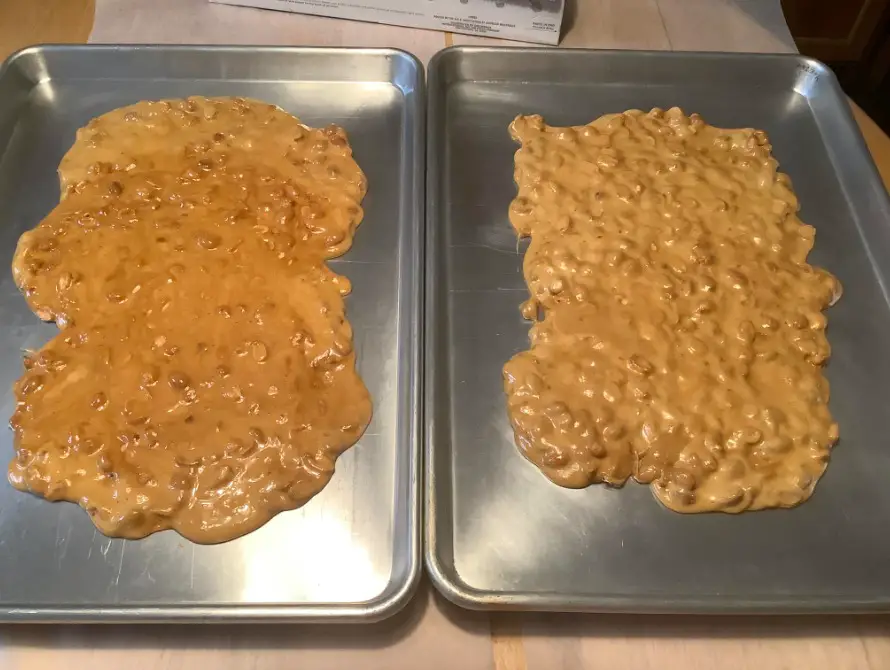
- Pour the foamy mixture onto the prepared cookie sheet. Use a heatproof spatula to spread it thinly and evenly. Don’t worry if it’s uneven; the texture adds to its charm.
- Let the brittle cool completely at room temperature, about 30-45 minutes.
- Break and Serve:
- Once fully hardened, break the brittle into small, bite-sized pieces using your hands or the back of a knife.
Almond Brittle Variation
For a unique twist:
- Substitute 7 ounces dry roasted almonds for peanuts.
- Replace the vanilla extract with 1 teaspoon almond extract for a rich almond flavor.
Storage Tips:
- Store brittle in an airtight container at room temperature for up to 2 weeks. Avoid humidity, as it can make the brittle sticky.
Serving and Gifting Ideas
- Festive Presentation:
- Package brittle in decorative tins, jars, or clear cellophane bags tied with festive ribbons for holiday gifts.
- Pairing Suggestions:
- Serve with hot beverages like coffee, tea, or hot chocolate for a satisfying snack.
- Use as a topping for vanilla ice cream or sprinkle on desserts for added crunch.
Pro Tips:
- Microwave Wattage: Times may vary slightly based on your microwave’s power. High-wattage models might cook faster, so check for the golden-brown color as your cue.
- Quick Cleanup: Soak the casserole dish and utensils in warm, soapy water immediately after use to make cleaning easier.
Enjoy the nostalgia of homemade peanut brittle with this quick and reliable recipe!